Back to: The Complete Guide To Siemens TIA Portal
Before you can begin programming, you need to install TIA Portal on your computer. Because this is professional engineering software, the installer is large, the requirements are specific, and Siemens controls the downloads through their Industry Online Support (SIOS) portal. In this lesson, we’ll walk through the process step by step so you’re set up correctly.
System Requirements
Before downloading, make sure your PC meets the basic requirements for TIA Portal V20 (latest as of now):
- Operating System: Windows 10 or Windows 11 (Pro or Enterprise editions are recommended).
- Processor: Intel i5/i7 or equivalent.
- RAM: 16 GB minimum recommended.
- Disk Space: 50–100 GB free (the installer alone is ~30 GB, and the installation expands further).
- Other Software: .NET Framework (specific version may be required, installer should check automatically).
⚠️ Note: Running TIA Portal in a virtual machine is possible, but performance can suffer unless the VM is well resourced.
Step 1: Create a Siemens Account
- Visit the Siemens Industry Online Support (SIOS) website by clicking the download button in this step. Don’t worry that it’s a trial, it’s still the full software.
- Register for a free Siemens account if you don’t already have one (needed to download any Siemens software).
- You’ll confirm your email and sign in before downloading.
Step 2: Download TIA Portal
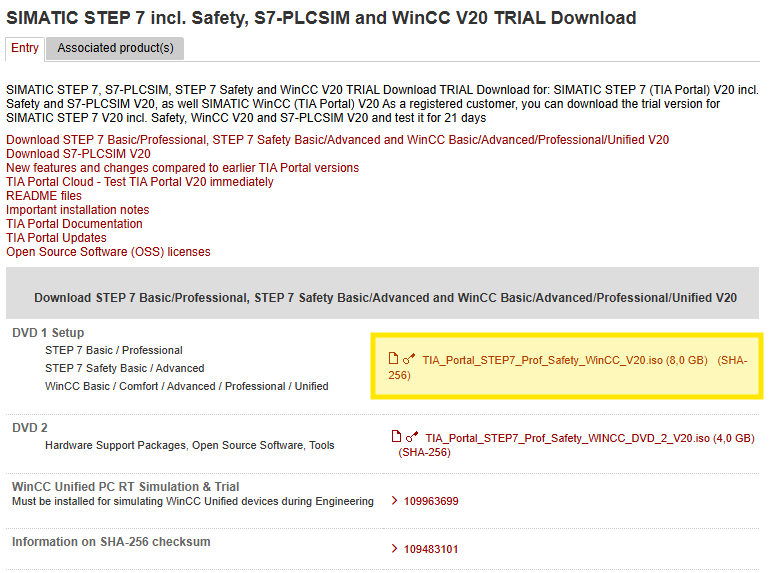
- Download the full installer (DVD 1)
Step 3: Mount the ISO Files

- This is an ISO file. Since windows 10, ISO files can be mounted to windows as virtual DVDs by simply double clicking. It can take a while to open as it’s large!
- You may need to accept a security request by Windows too
- Once open, it should look like the image above
Step 4: Run the Installer
- Run
Start.exe- The installer will first need to Initialize, which can take some time!

- Once the installer loads, you can select your languages and then you’ll be asked what steps to take next
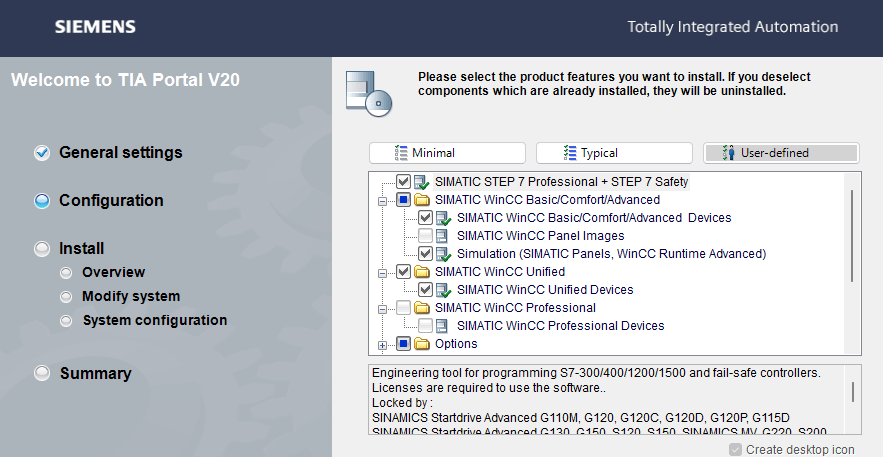
- Choose the products you want to install. You should be able to select the Typical option for most needs.
- Accept license agreements
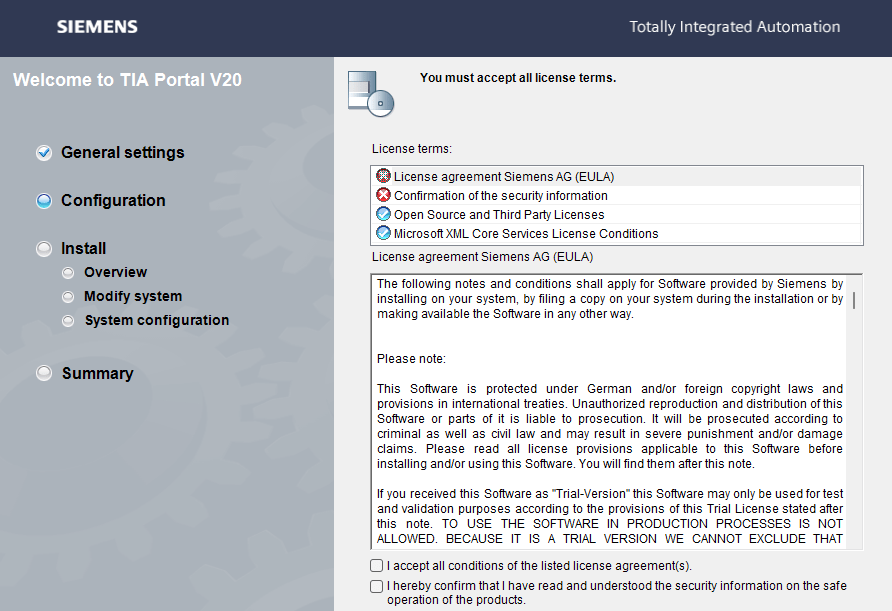
- Once the license agreements are accepted, the install will start.
- Installation can take 30–60 minutes depending on PC performance.
After Installation
- Restart your PC when prompted – This is important, if you don’t you can run into issues!
- You should now see the TIA Portal shortcut on your desktop.
- Check that the Automation Licence Manager is installed
- You can do this by searching Automation Licence Manager in the start menu
- Open TIA Portal
- It may take a while to load the first time.
- You’re now ready to move on to licensing.
Summary
In this lesson, you’ve learned how to:
- Check that your PC meets TIA Portal system requirements.
- Download and extract the TIA Portal installer.
- Run the setup and select the right components.
- Install Automation License Manager alongside TIA Portal.
DVD 2 Tia Portal 20V Hardware Support package is for what purpose?
DVD 2 contains hardware profiles for specific CPUs / IO Devices that aren’t included in the base install on DVD 1. It also includes additional legacy tools or special tools that aren’t bundled with the base software.
In most cases, you can ignore DVD 2